Before starting the installation process, ensure that all fan coil units HVAC components and tools are on-site. This includes the fan coil unit, supporting materials, and equipment.
Unbox and Inspect: Open the fan coil unit box and check for any damage, such as scratches, rust, or dents, especially on the motor casing and surface exchangers.
Technical Briefing: Ensure that the installation team has received proper training on the product and system requirements.
Correct fan coil unit positioning is crucial for optimal performance. The first step is to review the design drawings and identify the location of the fan coil unit.
Positioning: Based on the design, determine the location of the fcu unit, ensuring it aligns with the requirements for water and airflow.
Leveling: Use a laser or measuring tape to position the fan coil unit system accurately, ensuring it is level and correctly sloped.
A fan coil unit requires sturdy and stable mounting. Install independent brackets and suspension frames to securely support the unit.
Fixing with Expansion Bolts: Use expansion bolts to secure the FCU fan coil unit to the building structure.
Vibration Dampening: If the unit is heavy, install shockproof suspension brackets with dampers to reduce vibrations and noise.

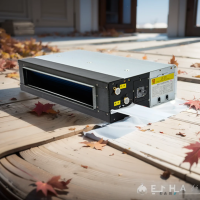
When installing the fan coil unit (especially horizontal models), ensure proper alignment and leveling during installation.
Hanging the Unit: Tighten the suspension rods with double nuts to ensure the fan coil unit is level. Place 3mm rubber gaskets on the nuts for added vibration dampening.
Water Drainage: Ensure the water tray slopes towards the drainage outlet to prevent water accumulation.
Once installed, double-check the height and position to confirm accuracy.
The connection between the fan coil unit and the chilled water fan coil system is critical to ensuring the system works properly.
System Flushing: Before connecting, flush the water system to remove any debris or contaminants that might block the heat exchangers.
Piping Installation: Follow the design drawings for pipe installation, connecting the chilled water pipes (blue for cooling, red for heating) to the fan coil unit.
Flexible Connections: Use metal flexible hoses with a maximum length of 300mm to prevent twisting and ensure smooth water flow.
After installation, it is essential to perform tests to ensure the fan coil unit operates efficiently and without issues.
Leak Testing: Check the water inlet and outlet connections and drainage pipes for leaks.
Airflow and Temperature: Turn on the unit and verify the airflow direction and temperature. Adjust the fan speeds as required to ensure optimal cooling or heating.
Condensate Drainage: Ensure condensate water flows freely through the designated drainage system, and the water tray is free from standing water.
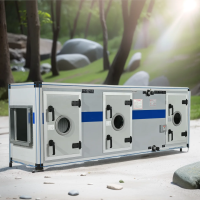
Installing a fan coil unit HVAC system requires careful planning and precise execution. Whether you're installing a fan coil unit in HVAC systems, a hydronic fan coil unit, or a fan coil unit in condos, the right installation ensures energy efficiency and long-lasting comfort.
At Yesncer, we specialize in manufacturing high-quality fan coil units, including chilled water fan coil units, concealed fan coil units, and more. Our OEM and ODM services ensure that every product meets the specific needs of your project.
👉 Contact us for more information about fan coil unit price and available options: Yesncer Fan Coil Units